A Shuttle Rotomolding Machine can make large, hollow parts without seams, while keeping loading and unloading separate from the heating cycle. That layout matters on a busy factory floor. One station can cool a molded tank as another mold enters the oven. Operators can inspect a part, trim flash, and prepare the next charge with less interruption.
Grand View Research estimated the global rotational molding market at about USD 5.3 billion in 2023, with projected growth through 2030. This market estimate signals demand, not guaranteed savings for any single plant. Dr. Richard Crawford, a researcher and author on rotational molding, explains the process as heating and rotating a mold to form hollow plastic products. His work points to the practical value of controlled heating and mold movement. A machine choice should reflect those fundamentals.
The shuttle design is worth considering when products need consistent wall coverage, frequent mold changes, or accessible workstations. Picture an operator checking a hollow kayak shell while the next mold moves toward the oven. Small details matter: oven capacity, arm configuration, cooling method, and safe access for handling molds. Not every line needs a shuttle. A low-volume shop may favor a simpler setup, and poor process control can still produce uneven walls or warpage. Ask suppliers for cycle-time data and sample parts made with your resin and mold. Then compare results under real production conditions. A brochure is not a factory trial.
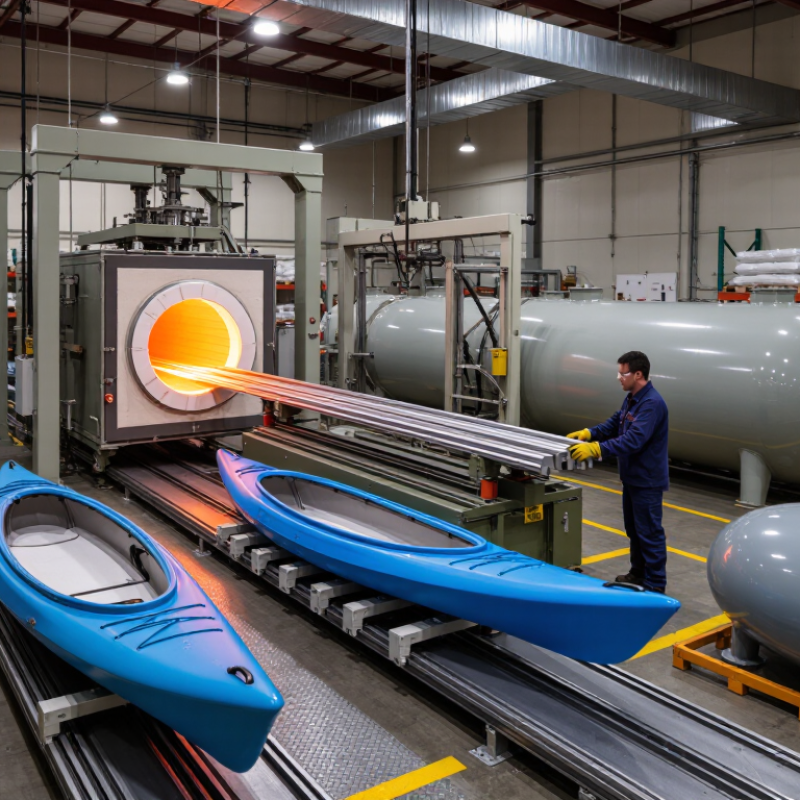
A shuttle rotomolding machine uses two mold-carrying arms and one stationary heating oven. One arm moves a mold into the oven while the other serves the cooling and loading area. As the first mold heats and rotates, operators can unload a cooled part and prepare the next mold. Then the arms switch positions. The oven stays in place; the molds travel.
This arrangement can keep oven time productive without requiring two ovens. It suits production runs where molds need separate loading, heating, and cooling attention. Grand View Research estimated the global rotational molding market at USD 5.63 billion in 2022 and forecast a 5.2% compound annual growth rate from 2023 to 2030. That market estimate signals continued demand, but it does not prove that every shuttle line will raise output. Actual results depend on mold size, resin, heating cycle, and operator timing. The handoff can be awkward; small delays still add up.
Tips: Track oven time and changeover time separately. Check that both arms carry balanced loads, and leave room for safe mold handling. A simple cycle log helps reveal bottlenecks.
A shuttle rotomolding machine moves molds through an oven, then into cooling and loading areas. Typical oven settings range from 260°C to 400°C, but the right setpoint depends on the resin, mold design, and part thickness. The oven temperature is not the same as the plastic temperature. A thick corner takes longer to heat than a thin wall.
Operators monitor cycle time alongside temperature. For example, a large hollow part may need more oven exposure, while excessive heating can cause discoloration or weaken the material. A surface probe or recorded cycle data can help reveal what the oven display alone misses. Small changes matter.
The shuttle layout gives operators room to adjust loading and cooling without stopping every mold movement. Still, temperature readings can vary across the oven, and a setting that worked yesterday may need review after a material or mold change. That part is easy to overlook. Checking wall thickness and finished-part quality helps confirm whether the heat cycle is working as intended.
For a shuttle rotomolding machine, estimate output from the complete mold cycle, not the time spent at one station. Divide 3,600 seconds by the cycle time, then multiply by the number of cavities producing parts per cycle.
If a cycle takes 18 minutes and the mold has two cavities, theoretical output is about 6.7 parts per hour. Simple math.
That figure assumes every cycle runs on schedule and every part passes inspection. Real production loses time during loading, demolding, material changes, and routine checks. For planning, apply a realistic operating factor.
At 85% efficiency, the example yields roughly 5.7 acceptable parts per hour. A shift log can reveal whether that factor matches your line.
Check what “cycle time” includes. On a shuttle machine, stations may work in parallel, so the full cycle is not always the time a single operator spends at one station. Track several consecutive cycles, including cooling and handling, then compare good parts with the estimate.
The calculation is useful, but it can be misleading if cavity count includes cavities that are not consistently used. Revisit the estimate after tooling or staffing changes.
A shuttle rotomolding machine can produce large hollow parts, but a smooth surface does not prove the material will perform well. Quality checks should include ASTM D638 tensile testing and ASTM D256 impact testing. D638 measures properties such as tensile strength and elongation as a plastic specimen is pulled. D256 evaluates impact resistance using a pendulum impact method. Together, these tests show how a molded material responds to steady pulling and sudden force. Different questions. Both matter.
For useful results, condition specimens consistently and follow the applicable standard for specimen dimensions and test setup. Take samples from representative areas of the part; wall thickness and heating can vary across a mold. A technician should record specimen location, thickness, and any visible defects, then compare results across production runs. Small details matter. These tests cannot predict every real-world failure, and a few specimens may not capture variation across an entire part. That limitation is easy to overlook. Reviewing test data alongside process records can help identify whether a change in rotation, heating, or cooling affected performance. The machine supports repeatability, but it does not replace careful testing.
Choosing a shuttle rotomolding machine starts with the part you actually plan to make. Compare rated payload with the combined weight of the mold, resin, and fittings. Keep a practical margin for heavier tooling or future product changes. A machine that only meets today’s load may limit production later.
Check mold dimensions against the usable arm and oven space, not just the machine’s advertised capacity. A large mold needs clearance as it rotates, including room for clamps and vent hardware. Measure the longest points and review the swing path with the supplier. It is easy to miss a handle or frame projection. Small details matter.
Energy use depends on more than the machine’s rating. Oven insulation, burner or heater controls, loading patterns, and idle time all affect consumption. Ask for operating data under a cycle similar to yours, and compare energy per finished part where possible. Cooling time deserves equal attention: thick sections may need longer cooling, while forced-air systems can shorten waits but may add power use. Track actual cycle times across several runs. One trial is rarely enough. Also note whether parts warp or release unevenly; the fastest setting is not always the most reliable one.
A shuttle machine can suit production that benefits from flexible mold handling and separate loading and cooling stations. Compare payload, mold envelope, energy use, and cooling time against your part requirements.
| Shuttle configuration | Payload | Example mold envelope | Energy per cycle | Cooling time |
|---|---|---|---|---|
| Compact | 250 kg | 1.2 × 1.2 × 1.5 m | 18 kWh | 18 min |
| Mid-size | 500 kg | 1.8 × 1.8 × 2.0 m | 30 kWh | 22 min |
| Large | 900 kg | 2.4 × 2.4 × 2.5 m | 48 kWh | 28 min |
Values are illustrative planning estimates, not standardized machine ratings. Actual energy use and cooling time depend on part geometry, resin, tooling, cycle settings, and cooling method. Confirm payload and mold-envelope limits with the equipment supplier.
It uses two mold-carrying arms and one stationary oven. One mold heats while the other is unloaded or prepared. The oven stays put.
It lets loading and cooling overlap with oven time, reducing idle time. Handoffs can still feel awkward, and small delays accumulate.
Typical settings range from 260°C to 400°C. The correct setpoint depends on the resin, mold design, and part thickness. The plastic itself may be cooler.
Thick corners heat more slowly than thin walls. Excessive heating may discolor or weaken the material. Small changes matter.
Divide 3,600 seconds by the full cycle time, then multiply by the number of working cavities. An 18-minute cycle with two cavities gives about 6.7 theoretical parts per hour. Simple math.
Theoretical output assumes every cycle runs on time and every part passes inspection. Loading, demolding, material changes, and routine checks reduce production. Not always obvious.
Apply an operating factor. At 85% efficiency, 6.7 parts per hour becomes roughly 5.7 acceptable parts. I would still question whether that factor fits your shift.
Track oven time, changeover time, cooling, handling, and good parts over several cycles. Check arm loads and finished-part quality. A simple log helps reveal bottlenecks.
A Shuttle Rotomolding Machine uses two arms to move molds through a shared heating oven, allowing one mold to heat while another is being loaded, cooled, or unloaded. This arrangement can support a steady production workflow, but results depend on choosing suitable process settings. Typical oven temperatures range from 260°C to 400°C; the appropriate setting varies with the material, part design, and mold. To estimate output, consider the full cycle time and the number of cavities in each mold, then calculate how many parts can be produced per hour.
When assessing part quality, tensile testing under ASTM D638 and impact testing under ASTM D256 can help evaluate mechanical performance. Machine selection should take several practical factors into account, including payload capacity, available mold size, energy consumption, and cooling time. Comparing these requirements with the intended production volume and part specifications helps identify a machine configuration that balances output, consistency, and operating efficiency.

